If working remotely, you will likely need to connect to a VPN to access most of your college or university resources.
To set up the UF VPN, you will first need the Cisco AnyConnect Secure Mobility Client.
1) Download and install the client for your device. If installing the Windows client, you only need the first install.
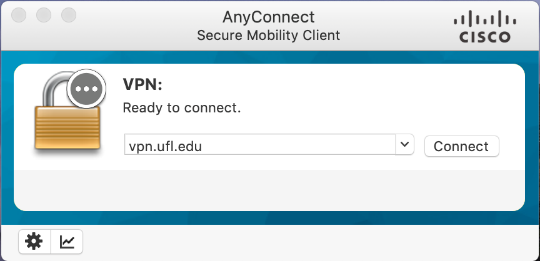
2) Once installed, run the client and connect to “vpn.ufl.edu”. It may be prefilled with “Gatorlink VPN”; this is the same service, and does not need to be changed.
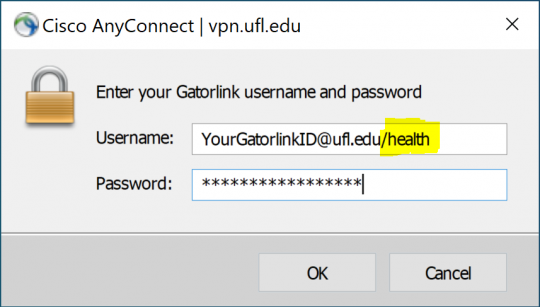
3) At the login prompt, put in your UF GatorlinkID in this format: “YourGatorlinkID@ufl.edu/health”. The /heath is important, as it provides you access to protected UFHealth resources that the normal Gatorlink VPN does not.
4) Enter your password as normal. With UF two-factor authentication, the first time you login you will get a Duo prompt that will need to be acknowledged quickly. Subsequent logins will have a longer Duo timeout[1].
Once connected, you will be able to access remote desktops through PHHP, and other college and university resources.
More information about the UF VPN service and device configuration guides can be found here.
[1] For those of you who are in two-factor and want to see more details on alternate Duo authentication methods with the VPN, take a look at the “append mode” section on the Gatorlink VPN faq


